
Constant Contact Integration
In this article, we will discuss the process of setting up Constant Contact integration in the REALSTACK app. This will allow you to import website lead contacts directly from the REALSTACK app to Constant Contact.
Let's get started!
Constant Contact Integration
- Login to your profile using the REALSTACK application.
- Open your profile by clicking your name in the top right corner and then selecting My Profile.
- Scroll to the bottom of your profile to the Connected Apps section.
- Toggle the Constant Contact switch to Yes.
- You'll see a popup asking if you'd like to connect. Click "Yes, Connect Constant Contact Account".
- At the Constant Contact login screen, log into your account.
- If you have multiple Constant Contact accounts, select the one you'd like to integrate with.
- Authorize REALSTACK to access your Constant Contact account.
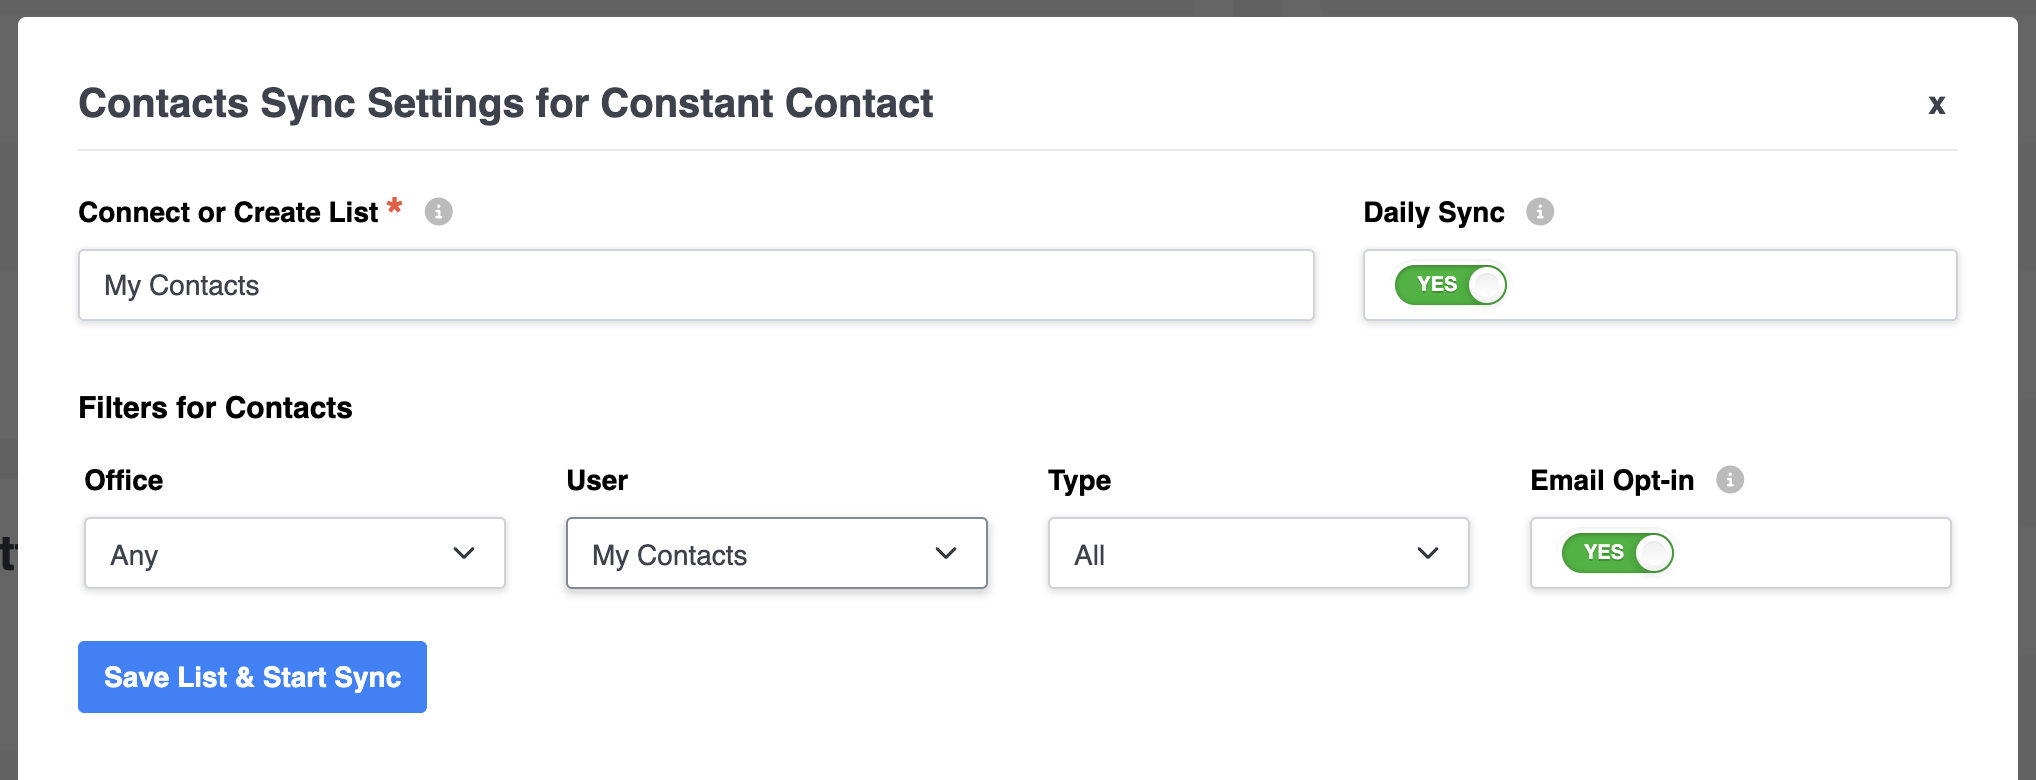
- A new window titled Contacts Sync Settings for Constant Contact will appear.
- In this window, in the Connect or Create List field, select a contact list that already exists in your Constant Contact account, or click the blue Add New List option in the dropdown menu.
- Make sure that Daily Sync is set to Yes in order to re-sync your REALSTACK contacts every 24 hours.
- Alternatively, you can set this to No if you would prefer to update your Constant Contact lists manually from a .csv file.
- Once the Filters for Contacts fields are set to your preference, click Create List & Start Sync.
- If the contact syndication is successful, a Success window will pop up. Click the blue OK button to dismiss this window.
Contact Sync Settings for Constant Contact
Now that your account is integrated, you can specify how you want to integrate contacts. To get to these settings, follow the steps below.
- Login to your profile using the REALSTACK application.
- Open your profile by clicking your name in the top right corner and then selecting My Profile.
- Scroll to the bottom of your profile to the Connected Apps section.
- Select Contacts Sync Settings.
In the Connect or Create List input field, you can change the Constant Contact list that you'd like to sync your REALSTACK contacts to, or you can create an entirely new list from the REALSTACK dashboard.
The Daily Sync setting gives you the option to sync contacts daily into Constant Contact or do a one-time sync.
Filters for Contacts
- If your brokerage has multiple offices set up in REALSTACK, you can use the Office filter to send contacts for a specific office.
- You can use the Users filter to decide whether you'd like to sync your own contacts, those of another specific user, or all of your brokerage's contacts, which can be done by selecting All Contacts.
- You can use the Type filter to add one of the following type options to your contact agent:
- Agent
- Appraiser
- Attorney
- Broker
- Client
- Inspector
- Lender
- Media
- Prospect
- Surveyor
- Title
- Other.
- The Email Opt-in setting gives you the opportunity to choose between sending only contacts that have opted in to receive your emails or all contacts regardless of their opt-in status.
If you still need additional assistance, contact support@realstack.com.